How to Create Professional Reports and Documents in Microsoft Word
This guide examines the elements of a professional report and reviews the structuring, styling, and finalizing of your document in Microsoft Word.
If Microsoft Office had been a country, it would have been the third most populous country in the world. 1.2 billion people using a single suite of apps is mind-boggling. And, they "speak" 107 languages!
But right now, you and I are speaking in English and we are going to talk about the most popular tool in the Microsoft Office arsenal -- Microsoft Word 2016 .
This document editor is used for writing a variety of documents. From a simple application to the necessary resume. From a plain bucket list to an office memo. We think we can work with Word. But it is when we sit down to write a serious professional report, we discover an important fact.
Professional report writing needs a different set of skills.
So, ask yourself this -- can you make the leap from a single document to a lengthy report? Do you know all the Microsoft Word features that will help manage this large scale document project? Can you collaborate on the work with other team members?
You may be a student, a small business owner, or an office worker...you will need to create a report or a professionally formatted document of some kind. This MakeUseOf guide will help you update your techniques and sharpen your design approach.

In this guide:
Writing a Report -- Introduction | The Report Checklist
Useful Microsoft Word Tools -- Paste Special | Researcher | Freeze Parts of Your Document
Work on the Layout & Design -- Intro | Cover Page | Table of Contents | Header and Footer | Page Numbers | Font Styling | Paragraph Styling | Page Breaks | Styles and Themes | Captions | Quick Parts | Page Borders
References and Collaboration -- Index | Bibliographies | Cross-Referencing | Comments
Finalize Your report -- Signatures | Watermarks | Read Only | Print to PDF
The Next Step -- Conclusion
Writing a Report
Report writing involves research and then publishing the outcome of that analysis. In the professional world, the "look" or appearance of what you publish is paramount. The eye-pleasing final result could burnish your reputation and enhance your personal brand.
The steps below will handhold you through the expert features in Microsoft Word 2016. Spend a lot of time on a plan. Start with these guidelines…
Step 1: Decide the Purpose
Before you begin the report, you must first know why you are writing it in the first place. Reports are of many kinds but they are either meant to inform or persuade. It can be meant for describing a technical process, sharing background information, or demonstrate progress on a project.
Ask yourself – What and Why . This will help you distill the purpose to the one main point and stick to it instead of rambling on with unnecessary details.
Step 2: Identify Your Audience
The second important consideration is to evaluate your audience. Will they be able to understand what you are talking about? Are there different levels of readers who will read the report? The reader's knowledge of the subject will greatly influence the information that you need to include.
Decide on the primary audience and then script the report at the adequate technical level. The secondary audience can be supported with supplemental information at the end of the report.
Step 3: Know Your Topic
You must know what you are talking about. So, research the topic, and include all the relevant information to prove your point. Make sure that you come to a conclusion based on facts and not personal opinion. The information must be correct, current, and well-referenced.
Also use a variety of resources such as journals, newspaper articles, books, websites, brochures, raw data, annual reports, and speeches to help support your point. Just don't stick to Wikipedia.
Step 4: Outline the Report
You have done the research. There's a ton of information that is waiting to be typed and printed. But wait! Don't drown before you enter the water. Prepare the final outline of the report which will be the chart of waypoints to help you navigate from start to finish. The outline is the blueprint. It will give you a bird's eye view of the land and also show you where you need to fill in the details.
The structure of an idea report can include the following elements:
- Executive Summary
- Table of Contents
- Introduction
- The Body of the Report
- Recommendations
- Bibliography and References
Microsoft Word's Document Outline is a powerful feature that can help you organize a document even before you start filling it with research. Take advantage of brainstorming and mind-mapping templates too.
Step 5: Write, Edit, Proofread, and Finish
Once you have structured your report, it is time to fill out the headers with content. I personally find it best to tackle a little bit of each section, and then bulk it up with information. You can do that if you want, or finish each section as you go down the report structure. Make sure you focus on presenting your ideas and using supportive evidence rather than spelling and grammar first. Outline your argument and write a few sentences that cast your main ideas. If you find something worth quoting, quote it.
Once the majority of your text is written, it is now time to read through it and make sure it flows well. Make sure you guide the reader's understanding with transition words such as "This information shows…", "In other words…", "Similarly…" and do highlight relevant and key points.
Finally, spend time to proofread, check for grammar and spelling , and double-check all relevant information and its logical flow. It is best to leave at least one day to check and proofread your work. Don't try to edit it straight after you think you have finished, as you will tend to miss read what you have written. Get some sleep, and proofread it the next day.
The Report Checklist
Before you go and submit or hand in your report that you have worked so hard on, make sure you have done the following:
- Completed the title page with the Title, Your Name, Date, Who the report is for, and a possible description of what the report is about.
- The contents page has appropriate headings and pages numbers are correct.
- Make sure the introduction covers key points, the scope of the report, and the objective it wants to meet.
- You have added captions above tables and below images/graphs.
- Does the content of the report present the information in a clear way, logical, factual, stay on topic, is to the point?
- Does the conclusion state the results, restate main idea's, and does not include any new information?
- Are the headings and sub headings clearly labeled?
- Are quotes relevant, up-to-date, and correctly referenced?
- Have you used page breaks where appropriate?
Now, let's launch Microsoft Word and take you through the features that will help piece together the draft of your report and present it as a professional document.
Useful Microsoft Word Features for Report Writing
Take these as bite-sized tips and master them one by one.
Microsoft Word is a big howitzer with many nuts and bolts. Let's focus on the key skill sets and the tools you will need to plan, prepare, and present the professional report. The Microsoft Word features we will cover below are also productivity shortcuts that will make your job easier.
Tip: Use Microsoft Word 2016's "Tell Me" assistant to learn more about new features in the Office suite.
Let's start with three preliminary tools...
Use Paste Special
For most of us, when we need to copy text or an image into Word, the CTRL+V shortcut does just fine. But sometimes we might want to paste the copied data into another format, such as Excel data as an image. With the Paste Special command you can discard or specify the format when you paste a picture, presentation data, table, or object from any other program into Word.
You will work a lot with Excel tables and charts in a professional document.
If you just copy what you want and click paste, you will notice that it will insert the data as tables. But, if it is a large area of cells you want to paste, and you do not want to edit it, you may want to paste it as an image, with the extra option to edit it.
In Microsoft Excel: Select and highlight the cells that you want to copy > Press CTRL+C.
In Microsoft Word: Go to Home > Paste > Paste Special . Select Paste Special and from the dialog select Microsoft Office Excel Worksheet Object .
You can resize the data as it was an image, and if you double click, you will be able to edit the values. You can change the table or chart and redesign it. And, if you update the data in the chart or table in Excel, you can automatically refresh the chart in Word.
Try the right-click context menu too. The Paste Special menu pops up:
There are more options to import data from Excel into Word . The Microsoft Office Support page also describes them in detail.
Use the Researcher
Yes, there is Google and Wikipedia. But constantly switching from Word to your browser can hamper your productivity. Office 2016 brings in powerful research integration to this grunt work. The Researcher can not only help you find content from within Microsoft Word but also help you quickly add citations. It uses the Bing Knowledge Graph to find the right content to support your document.
Go to Ribbon > References tab and c Choose Researcher . A pane will open on the right with the search options.
Type a keyword for the topic want to search for and press Enter.
The Results pane shows a list of sources you can use in your document. Choose a topic to explore in detail.
Add the topic to your Microsoft Word document with a click on the plus sign on the top-right. You can also click the plus sign on any result to cite the source in your research document. The cite source helps you support your research with web sources and books.
As we will see later, an annotated bibliography is one of the toughest parts of a document. The Researcher is an intelligent assistant who steps in.
Freeze Part of Your Word Document
Let's take for granted that your professional report will be a long and complex work. You can split the Word window into two panes so that you can view two different parts of a document at the same time. It is a valuable time saver when you want to copy and paste parts from one place to another or refer to one part of the document while working in another.
Go to Ribbon > View tab > Split .
To remove the split, click on Remove Split in the same tab.
The Windows group gives you several options to change the way you work with two or more documents. The features are self-explanatory.
To scroll both documents at the same time, click Synchronous Scrolling in the Window group on the View tab. You can also click on View Side by Side to put two parts of the document next to each other.
Tip: Use Split View to display two different layouts – for instance, Print and Outline. Set the split. Then, click in the pane that you want to change, and then select a different layout on the View tab.
Work on the Layout & Design
The presentation of a report is what gets someone to read a report in the first place, and that is why it is crucial that your report is well presented. If you had the choice of four reports to read, what will you choose?
- A hand written report.
- A document printed in black and white.
- A report printed on normal A4 paper in color.
- A report printed in color, with a catchy title page, neatly bounded, and slick?
You will pick up the fourth report because it will pull you towards it by the visual appearance alone.
The front cover is not the only reason. A well-designed report is easier to read. It is also easier to scan when you don't have time to read. That is why you need to spend some time on your headers and footers, and the different styles and themes. In short – the formatting of every element in the report.
Formatting may seem like a difficult chore, but it is a fun exercise that will exercise all your creative muscles. The key takeaways will be the skills you can apply to anything in Microsoft Office going forward. And the time you will save with all the productivity tips learned here.
Microsoft Word 2016 has a wealthy set of features. These are only some of the ways that your report design can stand out from the rest and be professional. So, let's break down the layout and design skills.
This section will cover these features step-by-step:
- Start with a Cover Page
- Make a Table of Contents
- Create Your Header and Footer
- Add Page Numbers
(Format the Content)
- Pick the Right Fonts
- Style the Paragraphs
- Control Page Breaks
- Use Styles and Themes
- Use Quick Parts
- Decorate with Page Borders
1. Start With a Cover Page
The first page is the first point of contact with your reader. It is also your opportunity to make a favorable impression. Don't let your lack of artistic skills be an excuse because Word takes up the job with its in-built gallery of title pages. All you have to do is marry one to the theme of the report.
Microsoft Word 2016 offers you 16 pre-formatted templates and three more on Office.com.
Go to Insert > Pages Group > Cover Page .
The cover page appears at the beginning of the document by default.
As there are only 16 "official" templates on offer, you may find that all your other peers have the same cover page. So, why not customize it, and make it a bit more unique.
You can design a title page (or cover page) in Microsoft Word that can be an original in the stack. Save it as a template or easily change the design on the fly.
2. Make a Table of Contents
Casual readers scan. Good readers scan first and then dive deep. A table of contents provides the waypoints that help both. When it is a long and complicated document, wouldn't you rather check the lay of the land before you head to the section that interests you?
Consider a Table of Contents (TOC) if your document is more than 10 pages long. You should first make sure you don't need to rearrange any pages in your document before creating the TOC.
In Microsoft Word, you don't have to write the entire TOC by hand. There's a Table of Contents automatic tool under the References tab which takes your outline and designs it for you. Also, you can easily keep it updated when you want to change something.
There are also templates you can download and fit it around the nature of the content. For instance, a TOC for a thesis will look different from that of a company's annual report.
We have a complete tutorial on how to create a table of contents page in Word .
The gist of it is this:
Create the outline and use heading styles to organize the hierarchy. Apply the automatic TOC tool to the heading styles. Word 2016 searches for those headings and then inserts the table of contents into your document. Then you can automatically update your TOC if you make changes in your document.
For more hands-on control, you can also use the Manual Table of Contents style. Word inserts placeholder text and you have to insert and format each content in the list.
3. Create Your Header and Footer
Headers and Footers are important in reports as the main purpose is to provide information about the report on every page. They are the common display areas for page numbers. The header of the document should contain the title of the report, and possibly the name of who created it. The title of the current section is helpful.
The footer, on the other hand, should include the page numbers, date of publication, and other administrative information that is required. Do note that some style guides have special guidelines for headers and footers .
Let's start with the header in your document and give it a unique look.
Select Insert , then select either Header or Footer from the group. The built-in gallery shows you several options you can choose from.
The header and footer space is inserted in your document with placeholder text or table. The Header & Footer Tools opens on the Ribbon for other formatting work like the date, time, or picture.
Enter your text and then select Close Header and Footer .
You can start with a blank header and footer. If you have the design skills, use the Header & Footer Tools to design your own. Master the header and footer space if you want to create custom letterheads for your organization. You can use brand elements like company or organization logos at the top and neatly formatted footnotes at the bottom
Let's try with and modify one of the inbuilt headers. I selected Facet from the gallery.
The final look took two minutes to put together with simple text effects and an icon sourced from the Microsoft Office icon gallery.
The header and footer are in place. But, how do you know where you are in the document? Insert page numbers as the next important signpost.
4. Add Page Numbers
Page numbers look best in the footer (unlike in the header as in the image above). You can add a basic page number from the Insert > Page Number button on the Ribbon. You can also add it from the Design tab that appears when you add the header and the footer.
You have a lot of control over page numbers. Choose from a wide range of number formats and customize them to your needs. In this case, we are adding the number to the footer, but you can put them at the top or even at the margins. In this example, I have placed the page number at the bottom left. But, I would like to change the default look and the format.
For example: Using a "Page X of XXX" makes for a better indicator on a long document.
Select the page number. Go to Insert > Quick Parts . From the drop-down menu, select Field . You can also reach the Field dialog from the Header and Footer Design tab.
Choose NumPages from the long list of field names. From the box on the right, you can pick a specific format. I selected the usual 1, 2, 3. Click OK , and the number of the number of pages will appear. Now all you have to do is add your text such as Page X of XXX, and change the look of the numbers with the usual text formatting tools available from the Home tab.
It now looks like this:
Design the look on any page number in your document and Word updates all the remaining automatically. Page numbers are the most common elements in a footer, but it can also hold any other information like the header. From the options in the Insert group, you can add the date and time, document info, pictures, and more to your header or footer.
Next, we're heading into formatting the content.
The visual draw of your professional report comes together with the "beautification" you apply to the content. Formatting is also an essential step for a document that flows well. So, you must focus a lot of energy on picking the right font, paragraph space, and the colors.
Don't worry. Even, the artistically challenged will find this part easy because Microsoft Word comes packaged with default themes and visual styles. Let's start with the most basic element of a document.
5. Pick and Style the Right Font
Your choice of font in a professional Word report not only determines how the text stands out but also how it is printed. You want both for maximum impact.
You can apply a typeface (i.e. the visual look of the font) to either an entire document or to specific parts of a document. All font choices are available from the Home tab. Go to Home > Font .
The default font in Microsoft Word 2016 is Calibri. Look beyond that as you have lots of others to choose from. If you choose Times New Roman, you may be considered lazy, if you choose Windings, well… I don't think I need to explain that. So make sure you choose a font that is easy to read and suits the report. To play it safe, pick from one of these professional-looking Google fonts ; they're available for free.
Tip: Baskerville and Georgia are good alternatives to the over-used Times New Roman
Try different font pairing for the body text and Headings (and Subheadings). Several websites like FontJoy and TypeWolf will help you experiment with font pairings. You can download and use custom fonts too. But remember the thumb-rule -- never use more than three different typefaces in a document.
For that extra bit of pizazz, try a drop cap to enhance your text .
6. Style the Paragraphs
If you want to have your lines double spaced, or single spaced, you need to change the format of the paragraphs. By changing the spacing, you can make a document easier to read or give the impression that it is longer and that you have put more work into it.
To change the paragraph for the whole document, it is best that you select each block of text; otherwise, if you are using headers in your report, they will change too. Another better option is if you customize the particular style you are using to format the paragraph.
To do this, go to Home > Styles . Right click on the style you want to change and select Modify . Click on Format > Paragraph which is at the bottom of the dialog box. Now, change the spacing, indentation, and alignment for the paragraph. Click OK to close the dialogs.
When you want to change a smaller portion of the document , select what you want to change. Right click on the highlighted text and select Paragraph . The same dialog box as above will appear.
7. Control Page Breaks
A page break -- by its very name -- splits a continuous block of text across two pages. Page breaks are important structural elements for long documents. Word automatically inserts a page break at the end of the page. But in a long document, you can place page breaks where you want them.
To insert a manual page break, click Insert > Page Break. (Keyboard shortcut: CTRL + Enter)
A page break looks like this when you click on the Show/Hide command in the Paragraph group .
But what if you want to keep a bunch of lines together on a page or column and not have them separate because of a page break? The layout is in your control. Click the tiny arrow you see in the bottom right of the Paragraph group.
In the Paragraph box, click Line and Page Breaks. Select from these four pagination options:
- Widow/Orphan control places at least two lines of a paragraph at the top or bottom of a page.
- Keep with next prevents breaks between paragraphs you want to stay together.
- Keep lines together prevents page breaks in the middle of paragraphs.
- Page break before adds a page break before a specific paragraph.
We've also shown how to remove page breaks when necessary.
8. Use Styles and Themes
Styles and themes are perhaps two of the more underused features in Microsoft Word . But I think you should use them at every opportunity to save a lot of time.
But what is the difference between a theme and a style? Microsoft says:
Themes provide a quick way to change the overall color and fonts. If you want to change text formatting quickly, Word Styles are the most effective tools.
So, as themes control the general look with color, effects, and fonts – start with a good theme for your document first. Then , use Styles to dig into the specific portions you want to change the appearance for.
For Themes: Go to the Design tab. Pick a theme from the gallery. You can see previews of what the color combination is like.
For Styles: Select the part of the text you want to change. Go to the Styles group on the Home tab. You can see previews of what they look like. Choose the Style that is suitable for your content. For instance, choose a heading style for the headings in your document. Or, a particular style for any quotes. You can also modify an existing style and create new styles from scratch.
9. Captions
Every picture, chart, or illustration needs a caption to clearly describe it. It is a single line of text, usually located below a graphic. Captions are also an important reference when you need to mention them in another place. Many documents omit this small detail.
It is easy to add a caption. Right-click the illustration you want to add a caption to. Select Add Caption .
In the dialog box, add your caption text and configure the remaining options. Captions can be automatically referenced in Word.
10. Use Quick Parts
Professional documents can get repetitive. This is why you should start using Quick Parts for boilerplate content you reuse all the time. For instance, let's say there is a contract clause you include with every document. Or, some introductory information. Instead of repeated copy-paste, save them as Quick Parts and re-use them again and again.
Quick Parts is also a type of building block . You can see the gallery of all reusable blocks of content in the Building Block Organizer .
Save and reuse your own Quick Parts in two steps:
- Select the phrase, sentence, or other portion of your document that you want to save to the gallery.
- Go to Insert > Text group > Quick Parts > Save Selection to Quick Part Gallery . Change the name and add a description if you like. Click OK .
Just as easily, you can re-use the saved snippet of content.
Place your cursor where you want to insert a selection from the Quick Parts Gallery. Go to Insert > Text group > Quick Parts . Then click the sentence, phrase, or other saved selection you want to reuse.
You will notice three other categories in the Quick Parts menu.
AutoText: Word 2016 has retained the old AutoText feature. It works like Quick Parts for any block of text that you use a great deal. Example: A note you want to use with every document.
Document Property: A set of constant properties that you can include with every document. Example: Company name or author.
Fields: These are predefined elements that update automatically. Example: Date, time, page numbers etc.
Remember, entries for document property can sometimes include information you wouldn't want to share with everyone. So, keep a close eye on these fields and remove the hidden personal data whenever required.
11. Decorate With Page Borders
Page borders look good not only on flyers and invitations. If done right, they can add a touch of class to a document. A variety of line styles and widths and art borders are available from the Design menu on the Ribbon.
Go to Design > Page Borders.
In the Borders and Shading box, use the Page Border tab to design your border.
The settings are self-explanatory. Try Shadow or 3-D with the right colors to add a subtle but elegant border. The Art styles with their clip-art borders might be too garish for professional documents.
Use the four corner buttons in the Preview window to select the sides of the page to draw borders. Click these buttons to remove or add borders, as you wish.
Place the cursor on the first page of a document if you want to put a border around only the first page. You can also put borders around certain pages in a section. Place the cursor in the section — either in the first page of that section or in a subsequent page.
References and Collaboration
A Word report can seem like an unmanageable chore. It's like organizing a million piles of hay into neat little stacks. The idea is to know precisely which stack has the pin you are looking for. These features are meant to make it easier.
1. Create an Index
When writing large documents such as a report that contains a lot of information, a contents page may not be enough. An Index should appear at the end of the document, with page numbers to keywords and information in the report. Create an index to help the reader reference the right information with just the page number.
Make an index if your document has more than 20 pages. Microsoft Word 2016 doesn't let the process overwhelm you. It basically has two parts:
- Select the words or information you want to include in the index.
- Place the index at the right place in your document.
You can scroll through the finished document and mark the words or phrases you want to include in the index or mark them as you go along. Either way, select the text you'd like to use as an index entry or click where you want to insert the entry.
1. Click References > Mark Entry .
2. Edit the text in the Mark Index Entry dialog box. You can also add a sub-entry which further defines the main word you used in the index. You can add multiple levels and each appears indented under the main entry.
3. Under Options , you can also create a cross-reference to another main entry. A reader can use this to refer related information elsewhere in the same document.
4. Use the Page number format to decide on the appearance of the page numbers in the index.
5. Click Mark to mark the index entry. To mark this text everywhere it shows up in the document, click Mark All .
6. Repeat the process for all the words and phrases you want to include in the index.
You have now built your index. Insert it at the right place towards the end of the document.
1. Click on the page where you want to insert the index.
2. Click References > Insert Index .
3. The Index dialog box is displayed. Here you can choose to format the text entries, page numbers, tabs, and leader characters.
4. Choose the appearance from the different formats in the list and check the Preview window on the right. Remember, the Preview window doesn't show you actual index. It is just a "simulation" of how it will look like.
5. Click OK . Your Index is now ready.
Sometimes, you may need to add more entries to the index after you have inserted it on the page. Mark the entry and go to References > Update index to include the new mentions.
Also, add a heading for the index because Word doesn't do it automatically.
2. Creating Bibliographies
Your document is almost done. Now, you need to credit all the other research work and ideas which you have referenced in your document. It's time for a bibliography.
A company report might not need a bibliography but an academic paper isn't finished without one. The bibliography is one of the most painstaking jobs in an academic report. You need to have all your citations in order before you sit down to frame the bibliography. Also, decide on the citation style (typically MLA, APA , or Chicago-style ) as per the guidelines of your subject.
Don't hesitate to take advantage of third-party citation and bibliography generators for constructing this section.
But, Microsoft Word 2016 has a complete toolset to make this process as painless as possible. So, go to the point in the document where you would like to place the bibliography. It's good if you have at least one citation to include, but even if you don't, Word 2016 lets you use a placeholder citation and fill in the sources later.
Click References > Bibliography .
Word offers a few bibliography styles that differ only in their heading names. Choose the appropriate style and then insert citations from the button in the Citations & Bibliography group .
The bibliography tool has a few steps to it. For the sake of brevity, I will direct you to the excellent Microsoft Office help page which is a step-by-step guide.
Some academic papers will ask you to create an annotated bibliography . It is a more fleshed out version of a bibliography with a list of citations to journals, books, articles, and other documents followed by a brief paragraph. The paragraph is a description of the source and how it supports your paper.
3. Cross-Referencing
You can use a cross-reference to help the reader navigate through a long document. At any point in a document, you can tell the reader to refer back to a heading, page number, image, chart, footnote, endnote, and paragraph. A cross-reference link is a neat way to connect related information together. The reader just has to click on the link to go that snippet of information.
Here's how you begin:
1. Select the place for the cross-reference and type the text that tells the reader about it. For instance: "Refer to Chart 3 for future trends."
2. Go to Insert > Cross-reference .
3. In the Reference type box, click the drop-down list to select what you want to link to.
4. The options in the Insert Reference to drop-down will change according to your choice above.
5. In the For Which field, go through the choices and tell Word the exact information to link to.
6. Check the Insert as hyperlink box to create the hyperlink for the referenced information.
7. Click on Insert to include the cross-reference in the document.
Remember, our mention of captions? You can make cross-references to equations, figures, graphs, and tables if you used captions below them.
Word cannot create a cross-reference for something that does not exist. Word will let you know about these errors and also update the cross-references automatically when you change the page number or text of the referenced item.
4. Using Comments
A professional report can be a solitary job or you can take the help of a team to prepare the first draft. The humble Comment is one of the most underused tools of a Word document. It is displayed as a rectangular colored balloon in the margin or in the Reviewing Pane.
You can use comments as small "stickies" or self-notes. Leave little notes to yourself in the margins as you write, edit, and revise your way through a report or a manuscript. Be creative – add extra links to other resources, use them for tips and pointers, link to different parts of a document, or set up a feedback link for your readers. And when you finalize, you can easily remove all comments in Word .
Microsoft Word 2016 is also an enhanced collaborative writing tool. Comments play a huge role in communicating feedback across a team. Here's how the comment system works...
1. Highlight the text you want to add a comment to or click at the end of a text block.
2. Go to Insert > Comment . Type your comment in the box. The comments appear in the markup area on the right. The Print Layout view is usually the best way to see the comments alongside the text.
3. Go to the Review tab and see more options for comments. This tab also shows all the controls for tracking changes and comments in a collaborative document. Use the Markup options to display or hide the comments. For instance: No Markup will hide the comments and the markup area on the right.
Finalize Your Report
Once the bulk of your report is completed and saved, it is time to finalize your report. When I say finalize, I don't mean proofread it. That should be done too. Now, you have to take the security measures to protect the report from unauthorized changes and plagiarism.
These security measures will give an extra level of authenticity to your electronic file before you share it.
This section will cover:
- Insert watermarks
- Make the document 'read only'
- Password protect your document
- Print your document to PDF
1. Signatures
You can add text signature for a personal touch to the report. But a simple text signature does not need any authentication. A digital signature is the better way to protect your document from unauthorized access. A digital signature confirms that the document came from the signer and hasn't been tampered in any way.
Let's create a signature line in Microsoft Word 2016.
In the document, place your cursor where you want to create a signature line.
1. Go to Insert > Text group > Signature Line and click Microsoft Office Signature Line .
2. The Signature Setup dialog box is displayed. Fill the fields as indicated. If you are sending the document to someone else for signing, add instructions for the signer in the field reserved for it ( Instructions to the signer ). The signer can also add give the purpose for the signing if the Allow the signer to add comments in the Sign dialog box is checked.
3. Click on OK and the document will now display a placeholder for the signature.
Enter a signature:
When you need to sign a document with a digital signature, go to the signature line and right-click on it.
You will be prompted to sign with a digital ID. If you don't have one, Microsoft will tell you to get one from a signature service partner.
If you don't have a digital ID, you can just insert a textual representation of a signature line . You can use a written signature or an image that doesn't require authentication.
2. Insert Watermarks
A Microsoft Word watermark is a "fake" but still useful visual indicator for the status of the document. For instance, you can use a watermark that says "Drafts" to differentiate it from the final version of the document. Or, use the watermark to suggest the document is "Copyrighted" or "Confidential".
The "Draft" mark is the most common. But, Microsoft Word gives you several other watermarks to choose from.
1. Go to Design > Page Background and choose Watermark . The Watermark button will be enabled in the Print view only.
2. You can choose a picture or a text watermark from the gallery. Both horizontal and diagonal versions are available. The dialog box gives you all the customization options for the final look of the watermark. Try different fonts, layouts, sizes, and colors.
3. You can type your own text in the Text field to create your custom watermark.
4. Choose OK to apply the watermark to your document. Word automatically applies the watermark to every page except the title page.
3. Make Documents "Read Only"
A professional report by its nature should not need to be edited by its readers. Converting the document to a PDF is one way. But, you can also apply a few more restrictions in Microsoft Word and prevent accidental modification or omission of any kind.
There are three ways to protect a document.
First -- Make your document "read only".
This ensures that your document can only be read or copied. It won't prevent anyone from copying the file and making changes to the copy.
1. Go to the File tab > Info > Protect Document > Mark as Final.
2. When readers open a document, a bar on top will prompt readers to treat this document as read only. But, they can click on "Edit Anyway" to open the document in Edit mode.
Second -- Password Protect Your Document.
Protect your document from unwanted edits with a password barrier.
1. Under Protect Document , choose Encrypt with Password . Type a password and click OK .
2. In the Confirm Password box, type the password again, and then click OK . The document will open with the reader prompted for a password.
Microsoft uses the AES (Advanced Encryption Standard), 128-bit key length, SHA1 (a cryptographic hashing algorithm which generates an almost unique 160-bit key to replace the plaintext), and CBC (cipher block chaining) to give a hacker a well-deserved headache.
Third -- Restrict Editing.
This control feature helps you as the author decide which parts of the document others can edit and which will be locked out. Think of it as the bouncer who lets the VIPs in but otherwise bars the door for the common folk.
1. Go to Review > Restrict Editing .
2. Under Editing restrictions , check Allow only this type of editing in the document , and make sure the list says No changes (Read only) .
No changes (Read only) is the default restriction type. For a different restriction level for the document, click the menu and select from Tracked changes, Comments, or Filling in forms.
3. To free some sections from the editing blockade, select the sections for editing without restrictions. To select more than one area, click CTRL while selecting the area using the mouse.
4. You can check Everyone under Exceptions (optional) in the Restrict Editing panel. Or, click More users … and allow only specific users to modify the sections. The allowable areas will be marked with square brackets.
5. Click Yes, Start Enforcing Protection .
Now, type a unique password in the box that opens. You have to type it again to confirm it.
The password is optional. But it ensures that no one can just click Stop Protection and edit the document. If you are still paranoid, go ahead and encrypt your Microsoft Word document as we did in the second process above.
4. Print Your Report to PDF
The Portable Document Format comes with many advantages. Not least is its cross-platform compatibility across all computers. Your document is ready and now you need to share it or send it across to be printed. Many professional reports -- for instance, a legal document -- need to retain the format as intended.
Save or convert a copy to PDF. Microsoft Word 2016 does not need any third-party add-ins.
Go to File > Export > Create PDF/XPS .
Remember, your Word document may contain sensitive information that you do not want to be included in the PDF. Remove it before you publish to PDF. In the Publish as PDF or XPS window, choose Options . Then select Document and clear Document properties . Set any other options you want and choose OK .
Browse to where you want to save the file and click on Publish .
The Next Step...
You are close to the finishing line. The report is ready to be handed over to your readers. But there's one last job left.
Turn the pages and make sure (again) that your report is reader-friendly. Approach it with the eye of the reader. Have you organized your thoughts and written persuasively? Does the information flow well with the charts and illustrations? Can they skim through and find the information quickly? Is the text readable? Use the readability score to gauge the readability level of your documents as a final step.
You also might have noticed we didn't cover some aspects of Microsoft Word. For instance, Microsoft Word Tables are an important tool for data display. Or, the power of lists in information management.
Microsoft Word is more than a quarter of a century old, and packed with little features. At MakeUseOf, we have covered every nook and cranny of this beast. So, do use our resources to learn more about this software for free. Each new feature of Microsoft Word learned will make your life easier.
Make Your Report Shine
As author Nathaniel Hawthorne said,
Easy reading is damn hard writing
Isn't this true for professional report writing too? After all, if given a choice, no one may want to read it. Writing a business report and using it to communicate are two different things. Microsoft Word is just a tool -- it's your job to engage.
For some alternatives, check out the best online word processors . And for more help with professional writing, take a look at how to apologize in an email and mean it .
What are the best practices for writing professional business reports? Tell us in the comments.
How-To Geek
How to convert a docx document to a pptx file.
Word documents can be presented to your audience, too!
Quick Links
The easy way: do it on the web, convert a word document to powerpoint on desktop.
Not all presentations have to be made in PowerPoint. If your presentation's content is in a Word document (DOCX file), there are a couple of ways to turn your document into a PowerPoint presentation (PPTX file).
Related: How to Convert a Word Document to a PowerPoint Presentation
You can easily convert a Word document to a PowerPoint file on the web . It's an easy process, but you do have to upload your document to Microsoft's web app. If you'd rather work with your file locally, there's a way to do that on your PC.
Microsoft Word's desktop app doesn't offer the above feature to automatically convert Word files to PowerPoint. Instead, it uses a manual workaround to convert your files.
This workaround involves formatting your Word document in a way that PowerPoint accepts and then importing the document into the PowerPoint app.
First, Format the Word Document
The first step is to make your Word document PowerPoint compatible. To do this, apply the H1 header style to all headers and the H2 header style to all paragraphs in your document.
Start by opening your document with Microsoft Word. In the Word window, select a header in your document.
While the header is selected, in the "Styles" section at the top of the Word window, click the "Heading 1" style. Do this for all the headers in your document.
Next, select the paragraph beneath your header. Then, in the "Styles" section at the top, click "More," and then select "Heading 2." Format all of your document paragraphs this way.
Finally, click File > Save in Word's menu bar to save the document. (Alternatively, press Ctrl+s on Windows or Command+s on Mac.)
Close the document in Word.
Next, Import the Word Document into PowerPoint
Your Word document is now ready to be imported into PowerPoint and converted into a presentation.
Start the import process by opening PowerPoint on your computer. On the first screen in PowerPoint, click "Blank Presentation" to make a new presentation.
In the PowerPoint editing window that opens, click the "Home" tab at the top. Then, in the "Slides" section at the top, click the arrow icon beside "New Slide."
Select "Slides from Outline" in the menu that appears.
PowerPoint will ask you to select the file to import into your presentation. Here, select the Word document that you formatted earlier.
Your Word document will now be converted into a PowerPoint presentation. Each "Header 1" in your Word document will now have a dedicated slide in the presentation. Review this presentation and make changes to it if you want.
Lastly, save the presentation by clicking File > Save in PowerPoint's menu bar.
And that's all. Your Word document is now ready to be presented to your audience!
Now that you're done, if you have a PowerPoint presentation that you'd like to convert to Word , there's a way to do that, too.
Related: How to Convert a PowerPoint to Word and Make It Editable

Reinvent productivity with Copilot for Microsoft 365.
Microsoft PowerPoint

Copilot in PowerPoint
Turn your inspiration into stunning presentations. Get it now when you add Copilot Pro or Copilot for Microsoft 365 to your Microsoft 365 subscription.
Turn your inspiration into stunning presentations
Turn a spark of inspiration into personalized presentations with Copilot in PowerPoint. Copilot will turn existing Word documents into presentations, create new presentations from simple prompts or outlines, or find the best places for impactful imagery—and will help you leave audiences dazzled with skillful storytelling.

Designing slides has never been easier
Create well-designed, impactful slides with the help of Designer and Ideas in PowerPoint.
3D isn't just for the movies
Now you can easily insert 3D objects and embedded animations directly into PowerPoint decks from your own files or a library of content.

Interact naturally using voice, touch, and ink
Easily ink onto a slide, then convert handwritten notes into text and make hand-drawn shapes perfect in seconds.
Nail your next presentation
With Presenter Coach, practice your speech and get recommendations on pacing, word choice, and more through the power of AI.

Be on the same page
Always know where you are in the editing process. With the while you were away feature, track recent changes made by others in your decks.
Task management with PowerPoint and Microsoft 365
Tell your story with captivating presentations.
Originally starting from Free now starting from Free
Sharing and real-time collaboration
PowerPoint for the web
Basic templates, fonts, icons, and stickers
Dictation and voice commands
Works on web, iOS, and Android™
5 GB of cloud storage
Microsoft 365 Personal
Originally starting from $6.99 now starting from $6.99
$6.99 $6.99
(Annual subscription–auto renews) 1
PowerPoint for the web and PowerPoint desktop app for offline use
Premium templates, fonts, icons, and stickers with thousands of options to choose from
Dictation, voice commands, and transcription
Advanced spelling and grammar, in-app learning tips, use in 20+ languages, and more
1 TB (1000 GB) of cloud storage
Premium desktop, web, and mobile apps
Advanced security
Ad-free experience
Works on Windows, macOS, iOS, and Android™
Copilot Pro available as an add-on. *
Microsoft 365 Family
Originally starting from $9.99 now starting from $9.99
$9.99 $9.99
One to six people
Up to 6 TB of cloud storage, 1 TB (1000 GB) per person
Premium desktop, web, and mobile apps
Advanced security
Microsoft Powerpoint
One person
Microsoft 365 Apps for business
Originally starting from $8.25 now starting from $8.25
$8.25 $8.25
Available for up to 300 employes
Desktop versions of Word, Excel, PowerPoint, and Outlook
1 TB of cloud storage per user
Anytime phone and web support
Microsoft 365 Business Standard
Originally starting from $12.50 now starting from $12.50
$12.50 $12.50
Everything in Microsoft 365 Apps for business, plus:
Web, and mobile versions of Word, Excel, PowerPoint, and Outlook
Custom business email ([email protected])
Chat, call, and video conference with Microsoft Teams
10+ additional apps for your business needs (Bookings, Planner, Microsoft Forms, and others)
Automatic spam and malware filtering
Webinars with attendee registration and reporting
New: Collaborative workspaces to co-create using Microsoft Loop
New: Video editing and design tools with Clipchamp
Copilot for Microsoft 365 available as an add-on. **
Add Copilot to your Microsoft plan
Achieve more than ever using AI integrated with Word, Excel, PowerPoint, Outlook, and other Microsoft 365 apps.

Get the PowerPoint mobile app
Ready to create great presentations with Microsoft 365?
See more from microsoft powerpoint.
Collaborate on shared projects
Get commonly used Office features and real-time co-authoring capabilities through your browser.
Jumpstart your design
Show your style and professionalism with templates, plus save time. Browse PowerPoint templates in over 40 categories.
Connect with experts
See what’s new and get classic tips and editors' tricks to help you create, edit, and polish presentations like a pro.
Read about slide presentations
6 slide presentation software tips to impress, host large-scale virtual presentations, how to make a slide show, what’s new in powerpoint.
- [1] Once your paid subscription begins, cancelation policies vary based on your status as a new customer, product, and domain selections on Microsoft. Learn more. Cancel your Microsoft 365 subscription any time by going to the Microsoft 365 admin center. When a subscription is canceled, all associated data will be deleted. Learn more about data retention, deletion, and destruction in Microsoft 365 . Microsoft PowerPoint with a Microsoft 365 subscription is the latest version of PowerPoint. Previous versions include PowerPoint 2016, PowerPoint 2013 , PowerPoint 2010 , PowerPoint 2007 , and PowerPoint 2003. iTunes, iPhone, and iPad are registered trademarks of Apple Inc., registered in the U.S. and other countries. Android is a trademark of Google Inc.
- [*] Copilot Pro benefits are currently available on web, Windows, and macOS and iPadOS. A Microsoft 365 Personal or Family subscription is required to access Copilot in select apps, including Word, Excel, PowerPoint, OneNote, and Outlook. Excel features are currently in preview in English only. Microsoft 365 Personal or Family and Copilot Pro are not available in the same transaction and must be purchased in two separate transactions.
- [**] Copilot for Microsoft 365 may not be available for all markets and languages. To purchase, enterprise customers must have a license for Microsoft 365 E3 or E5 or Office 365 E3 or E5, and business customers must have a license for Microsoft 365 Business Standard or Business Premium.
Follow Microsoft 365
AI Presentation Generator
AI Presentation Maker
AI Image Generator
WORD to PPT
Convert to PPT
Convert WORD to PPT with AI
Summarize a WORD Document into a PowerPoint Presentation
Select and upload a Word document that needs to be summarized for a presentation.

Choose from a variety of presentation template styles and select the one that best represents your content.

Relax and Watch the Magic Happen. Sit back and let AI do the heavy lifting for you! Get a customized design and stunning presentation filled with informative and professional content.

You can then edit the presentation using your preferred application, such as MS PowerPoint or Google Slides, or with our online AI Presentation Maker.

Superfast presentation creation
Join 500K professionals & educators
✓ Create with AI ✓ Convert to PPT with AI ✓ Compatible with PowerPoint ✓ Built in templates ✓ Auto Layout
Researched by Consultants from Top-Tier Management Companies

Powerpoint Templates
Icon Bundle
Kpi Dashboard
Professional
Business Plans
Swot Analysis
Gantt Chart
Business Proposal
Marketing Plan
Project Management
Business Case
Business Model
Cyber Security
Business PPT
Digital Marketing
Digital Transformation
Human Resources
Product Management
Artificial Intelligence
Company Profile
Acknowledgement PPT
PPT Presentation
Reports Brochures
One Page Pitch
Interview PPT
All Categories
Top 10 Work Report Templates with Samples and Examples

Mohammed Sameer
Are you tired of mundane work reports that suck the life out of your productivity? Your reports can so easily be more than just a monotonous collection of data, but a dynamic showcase of your team's triumphs and strategic insights. Brace yourselves, because we're about to change the way you perceive and produce work reports.
Diving into the Depths: The Shocking Truth about Work Reports
In a world where data rules and decisions hinge on the insights gleaned from reports, the quality of your work reports can be a game-changer. Seven of 10 professionals believe well-structured work reports are crucial for decision-making. Yet, the unfortunate reality is that many reports fall prey to the drudgery of standard templates, causing eyes to glaze over and insights to be overlooked.
But fear not! The era of lackluster reports is officially over. We've curated a collection of 100% editable and customizable Work Report Templates that are more than just grids and charts; they're the catalysts for change, the architects of efficiency, and the champions of clarity in the corporate arena.
The Power Trio: Atlassian, McKinsey & Company, and Deloitte – Pioneers in Reporting Excellence
Ever wondered how industry titans like Atlassian, McKinsey & Company, and Deloitte consistently achieve unparalleled success? One of their secrets lies in the detailed crafting of work reports. These giants understand that a well-structured, visually engaging report is not just a document; it's a strategic asset. From tracking project progress to delivering exceptional consulting insights, these companies capitalize on the power of work reports to stay ahead of the curve.
Why Do You Need SlideTeam’s Work Report Templates?
Now, let's talk about you. Are your current reports putting your colleagues to sleep? Do you find it challenging to convey the true impact of your team's efforts? Are you craving a report template that mirrors your dynamism and professionalism?
Our templates have all this and more. Here's why you can't afford to miss out:
- Striking Design and Visual Appeal: Break free from the monotony with aesthetic templates that transform your data into a captivating narrative.
- Customization for Your Industry: Tailored for industries, our templates adapt to your needs, whether you're in tech, consulting, finance, or beyond.
- Efficiency Unleashed: Streamline your reporting process and reclaim precious time for strategic thinking, thanks to our user-friendly templates.
- Proven Success: Take a page from the playbook of industry leaders – like Atlassian, McKinsey & Company, and Deloitte – and witness the transformative power of exceptional work reports.
Let's explore the templates now!
Template 1: Annual Work Summary Report PPT Set
The PPT Report encapsulates an overview of your company's achievements and strategic initiatives. Beginning with a message from our CEO, it transitions through key sections, including company accomplishments, mission statements, and core values. It delves into customer service survey results, operational excellence, and cost summaries, presenting a sustainability scorecard. The report highlights strategic initiatives and work completion and outlines next year's strategic work plan. Efficient operational achievements and a Gantt chart illustrate your work management, while a strategy map showcases performance indicators. Download now!

Download this template
Template 2: Work Completion Report PPT Template
This Work Completion Report Template offers eight distinct formats. The Construction Project Work Completion Report tracks tasks with statuses (in process, due, completed), focusing on the handover of deliverables, client sign-offs, financial processes, and project member evaluations. The template extends its utility with a comprehensive Work Completion Report featuring project details such as name, manager, objectives, and timeline. Additionally, specialized formats like the Web Development Project Report provide a focused overview, emphasizing project summary, completion status, and variances. This versatile template streamlines reporting across domains, ensuring clarity and efficiency in project documentation. Download now!

Template 3: Project Management Statement of Work One-page Summary
This Project Management Statement of Work PPT briefly encapsulates project information. It commences with Organization Details, providing a foundational understanding. The Estimated Cost section outlines internal and external labor, material costs, resources, and other pertinent financial aspects. The Project Details segment delves into milestones, goals, stakeholders, and incorporates spaces for approval and comments. In just one page, this template encapsulates comprehensive project insights, offering a holistic view for effective management and communication. Download now!

Template 4: Monthly Financial Report PPT Preset
This PPT Slide condenses insights into key business metrics. The Month-to-Date Summary offers a snapshot of revenue, new orders, and total manufacturing activities. The Monthly/Quarterly Flash Report provides an overview of crucial financial highlights. The Shipment and New Order Summaries detail transactional activities, while the Backlog by Month sheds light on pending orders. The Manufacturing Production Summary outlines production metrics, and the Purchasing and Inventory Summary offers insights into supply chain dynamics. Get it today!

Template 5: Work Stream Health Status Report
This PPT Preset underlines your project vitality. Four distinct odometer graphics represent Health Status across key metrics: Sales, Issues, Budget, and Workforce. The presentation also incorporates a KPI dashboard, offering insights into the performance of Top 5 Workstreams, accompanied by adjacent areas for comments. The Project Summary section categorizes progress as either on track or off track, facilitating a quick and informed assessment of the project health. Download now!

Template 6: Program Status Report with Remaining Work
This PPT Template is your go-to resource for monitoring project advancement. It illustrates completion status through both the percentage of work and duration achieved. It sheds light on high-priority projects by budget, providing a clear financial snapshot. Furthermore, it categorizes tasks, breaking them down by business unit and project phases. This intuitive arrangement ensures a grasp of project dynamics, enabling stakeholders to understand completion metrics, financial priorities, and pending tasks. Download now!

Template 7: Workstream Updates Project Status Report
This PowerPoint Template keeps stakeholders informed of project progress. The Executive Summary offers a quick snapshot, while the RAG Status categorizes elements as Red (Attention), Amber (Warning), or Green (Proceed). Key deliverables, including System Automation, Customer Automation, and Operational Efficiency, are highlighted, ensuring a comprehensive understanding of project milestones. Get it today!

Template 8: Monthly Work Report for Employee Turnover
This PPT Set tracks workforce dynamics over four months. It records metrics such as New Hires, Terminations (categorized into Voluntary and Involuntary), Monthly Turnover Percentage, and Year-to-Date (YTD) Turnover Percentage. The design and intuitive layout provide a snapshot of workforce transitions, aiding in strategic decision-making. This tool empowers businesses to analyze and address employee turnover trends, fostering a proactive approach to human resource management. Download now!

Template 9: Monthly Work Report of Sales Activity
This PPT Slide gives you a dynamic sales snapshot of four weeks. It logs activities, distinguishing between In Sales Office and Out Sales Office engagements. The slide also captures the essence of office visits, spotlighting face-to-face interactions and collaborative endeavors within the office setting. Simultaneously, it tracks outreach efforts beyond office premises through a comprehensive account of Outside Calls. This structured and detailed presentation tool offers a new perspective to study and analyze sales performance. Download now!

Template 10: Construction Architecture Work Report
Presenting an adaptable PowerPoint Template prepared for Construction Architecture Work Reports, where the focal point is addressing the challenge of securing a reliable interior design service. In the "Problem" section, users can highlight and elaborate on the intricacies of their quest. The template then guides users through a systematic "Approach and Methodology," spanning Discovery, Review, Proposal, and Final Proposal phases. Crucial project specifications are detailed, ensuring requirements are met. Use this presentation template to present the breakdown of cost and payment as well, leading to financial clarity. This user-centric template streamlines communication, fostering efficient project management within the dynamic domain of construction and architecture. Download now!

The Precision Code
For professional success, precision and presentation matter. As we conclude this journey, remember: Your reports are more than summaries; these are strategic assets. Take a cue from industry giants and use the potential of our templates. Upgrade your reporting experience, communicate with clarity, and watch your professional narrative unfold seamlessly. It's not just a download; it's a subtle shift towards a more efficient, insightful, and prosperous business tomorrow.
Related posts:
- How to Design the Perfect Service Launch Presentation [Custom Launch Deck Included]
- Quarterly Business Review Presentation: All the Essential Slides You Need in Your Deck
- [Updated 2023] How to Design The Perfect Product Launch Presentation [Best Templates Included]
- 99% of the Pitches Fail! Find Out What Makes Any Startup a Success
Liked this blog? Please recommend us

Must-Have Annual Business Report Templates with Samples and Examples

Top 10 Professional Report Templates for Presenting Business Information!
This form is protected by reCAPTCHA - the Google Privacy Policy and Terms of Service apply.

Digital revolution powerpoint presentation slides

Sales funnel results presentation layouts
3d men joinning circular jigsaw puzzles ppt graphics icons

Business Strategic Planning Template For Organizations Powerpoint Presentation Slides

Future plan powerpoint template slide

Project Management Team Powerpoint Presentation Slides

Brand marketing powerpoint presentation slides

Launching a new service powerpoint presentation with slides go to market

Agenda powerpoint slide show

Four key metrics donut chart with percentage

Engineering and technology ppt inspiration example introduction continuous process improvement

Meet our team representing in circular format

- Infographic Design , Insights , Presentation Design , Visual Content
- 25th November 2019
How to create a professional report design in Word

The ability to produce a professional report design is not a dark art. By adopting some simple guidelines, you can create documents that your audience will be able to read and understand more easily.
The report designs we create for our clients are based on the science of how our brain and eyes work when they engage with information – these guidelines use that same science.
It’s all about cognitive fluency; the ease with which we process information in the form of words or graphics so that we understand their meaning. It’s our job to make that process as short and simple as possible.
We’re sharing six creative guidelines that we use to do this within our work, and that could help give professional finesse to your own report design.
01. Add a page header
Including a page header in your report design is a simple but effective feature. Many reports are now viewed digitally, and navigation bars can help your readers to move around your content more easily. They also give structure to the page and the document as a whole, framing the content and providing a consistent reference point for readers. Use colour or a bold font to help readers see where they are in the report.

02. Use columns for body copy
The column structure in which the words of the report are set is a key design feature of any written document and the width of a column affects readability.
We don’t read character by character or even word by word but instead we scan and then pause to pick up groups of three or four words. As three or four pauses happen before it gets tiring, we can work out that a column width should be between 9-12 words. That’s the principle.
Using two or three columns for your text can completely reinvent the look of your report. Try using one column for pull-out quotes, key points or imagery. It’s worth noting that white space is not wasteful, but more of that later.

03. Experiment with fonts
Before you start, think about the style of font (or typeface) you would like to use. Bear in mind that your choice will have an impact on how your report is perceived by readers as well as the more pragmatic design consideration of how easy it is for them to read it.
Try and break out of the default standard fonts, Times New Roman and Arial for example. There are plenty of good, standard fonts to choose from, whether you’re using Mac or Windows. Google fonts also has plenty of free commercial typefaces to download and use.
Fonts that have a range of weights (light, regular, medium, bold, italicised) are especially useful as you can add more sophistication to your report design. Light weights are effective for body copy and medium and bold for headings.

Add colour for important information such as headings and call-outs. Try a dark grey for body copy — it’s less stark than black and can make a report feel warmer and more appealing. Don’t go too far and too bright with the colours — readers will be put off as they reach for sunglasses and headache tablets.
04. Reduce the font size
In general, 10pt or 11pt is the widely used default size but in professional report design we most often use 9pt, sometimes dropping to 8pt. Often, text in 8pt or 9pt with deeper line spacing (known as leading) can be easier and faster to read because our eye can more easily see where the next word or line starts.
Consider if it’s likely that the report you’re working on may be read by those, old or young, who are partially sighted. Guidance about point size can be found on the websites of the RNIB, the charity for blind and partially sighted people or the UK Association for Accessible Formats.

05. Use white space
White space does not have to be white — the term simply refers to the space around written content, and it is certainly not wasted space.
Using white space enables you to draw your readers eye to a particular point or paragraph that you want to highlight and then gives your readers the room so that they can focus on the key section; understanding rises accordingly.
White space also allows the eyes and brain to rest at points, to stay interested as layouts differ from page to page, and prevents the brain from tiring as quickly as it might when presented with a full page of information to process.

06. Think about alignment
Alignment of words is simply the way in which you arrange the lines on the page. The most common are justified and ranged left. The former is where the column of words is aligned on both the right and left of a column; the latter is where the text is aligned just on the left.
When text is justified, each line is the same length, so the spacing between words varies from line to line. Justified text can look neater in smaller point sizes and wide columns, but is harder to read as the start and of end each line is more difficult to find.
When text is ranged left, the spacing between words is the same throughout the document, and the staggered line lengths actually make it easier to read as our brains more easily identify where a line starts and ends.
Our advice is to use left-ranged text with a two or three column layout.
The way a report is designed can say a huge amount about the value you place on your content. Client and, more importantly, potential client perceptions will be informed by the design of printed or online reports you produce as well as by the way they read.
If you’d like to chat to us about how we could help you create a professional report design, call us on 01606 276176 or email us [email protected] .
Related Posts

How to create valuable, actionable content that drives results

Thought leadership campaign assets: Reach farther, achieve more

5 content design agency myths: busted!

Introducing Matt Brown, Senior Designer

Create content that connects: REALLY get to know your audience

5 reasons for using a content design agency
Intelligent design for thought leadership, research and visual content.
QUICK LINKS
Give us a call.
01606 276 176
34 All Saints Street, Bolton, UK, BL1 2ER
© NWC Information Design Ltd 2024. Company registered in England and Wales, no. 11327280. Terms & Conditions | Privacy Policy
- April 2024: Great Graphs
- May 2024: Great Graphs in Excel
- October 2024: Report Redesign
- November 2024: Powerful Presentations
- December 2024: Dashboard Design
- March 2025: Simple Spreadsheets
- Self-Paced: Soar Beyond the Dusty Shelf Report
- Chart Templates
- Shirts & Hoodies
27 Comments
This was a great tutorial. Thank you for providing! I am designing my next report in PPT right now! Shhhh! ~Jessica, Child Advocates of Fort Bend
Your secret’s safe with us. 🙂
Woohoo! I’m glad this list has inspired you Jessica! Your secret is safe 🙂 Happy PowerPoint-ing!
wow, what a beautiful report in PP! Can you share it with us please? Thanks in advance
Hi Hossat, This report’s not available for download, sorry! It’s an internal report that Nick designed specifically for his audience. One of these days, “in all my spare time,” I’ll design some sort of template for these reports. Until then, I hope you find the behind-the-scenes screenshots to be useful.
Great post! I plan to use tip #3 right away. I use Nancy Duarte’s slidedoc format for reports and like this 8.5″ x 11″ option too.
Learning about “Align” a few years ago has already saved hours of my precious time! It’s the little things.
This tip was probably the simplest game changer for me. This works for everything (and in most MS Office applications ) for things like conference posters, handouts, reports, ACTUAL powerpoint slide decks… It’s really nice once you realize you’ll never have to nudge objects click by click anymore!
Nick — I literally used to zoom waaaaaaay to 400% or 500% on my screen, hold up a ruler, and eyeball all my text boxes to “align” them. Oops.
Does anyone know of any templates that already exist with it rotated and filled in content
Hi Jeremy, Check out https://www.duarte.com/slidedocs/ . THE trailblazer in “slidedocs” is Nancy Duarte and the dozens of staff at her company. I believe they have free templates to get you started. Like any templates, you’ll want to adjust the colors and fonts, at a bare minimum, so that it doesn’t look so default. Let me know if you encounter any other helpful templates.
Thanks for sharing this, great idea! Formatting on Word has always been a challenge for me
Hello, This is great! Do the reports created in Powerpoint meet accessibility standards for folks who use screen readers, etc.?
Great question. Someone asked this question on Twitter too. Here’s what I said: “I don’t see why it wouldn’t. Reports can be written in any software program (Word, PowerPoint, InDesign, Publisher, etc etc etc) and then PDF’d. I believe you can tag tables and images in any program.” And here’s what Nick said: “Using Accessibility Checker in PPT (as in Word) is important when creating… then when publishing to PDF, there a couple more clicks I think to make sure it exports as an accessible doc – found this in my search: http://lpc1.clpccd.cc.ca.us/lpc/blackboard/accessible_ppt/convert_ppt.htm ” Let us know what you learn in your search, too.
Definitely can Marissa, you just need to create the document in a way that’s accessible (as you probably normally would in Word) can use accessibility checker in PowerPoint when creating the report to see whch elements need alt text, etc and then follow these instructions when exporting to PDF: https://t.co/OrMkFSxihM
Hi Ann and Nick: a) Another way to get matching colors in different objects (point 5 of your post) without too much concern over if its well done, is to play with Saturation: 1- Shape Fill 2 – More Fill Colors 3 – Custom tab 4 – Color Model HSL 5 – And play with different levels of Saturation b) If we want to print the report directely from the PPT we must take in consideratin that the printer always put a white margin that we can’t see even at the Print Preview. Thanks for the post Miguel
This is a great point Miguel. I often click between my edit view and print preview when I’m making reports to see how it will print if I were to do so directly from ppt so I can check what that white border looks like and if it impacts anything I have on the page, especially important when bleeding images or objects over the page edges. This is one reason you want to be sure to custom format your page layout too, manually enter 8.5 width and 11 length instead of relying on the default “letter” size option that ppt gives you, which actually defaults the slide to 7.5 X 10. Thanks for the color tip too, I’ll try that out!
This is very interesting post on report creation in PowerPoint.
[…] How to Write Your Reports in PowerPoint Instead of Word: 9 Tips for Getting Started […]
Finally, it becomes easier to use MS powerpoint in terms of writing reports as my MS word was showing errors.
Great post, thank you. As a consultant I write reports for a living. I grew up on Word and was trained to write word-heavy, long form reports. Whilst I (think I) do that very well, I’m conscious that these days many people prefer shorter, more visual reports so I’m exploring how I might transition to that. Two issue I’ve always had with ppt are (1) the way it resizes text when I don’t want it to and (2) the way it works one page at a time, i.e. text doesn’t flow from one page to the next. Is there a way to address either of these? Might Publisher (which I’ve never really used; does it even still exist?) be a good alternative tool for the job?
Hi Patch, Argh yes, I have the same frustrations with PowerPoint.
Rather than using the built-in text boxes, which automatically re-size the text, I delete those and add my own. Then I have full control over the text formatting.
I don’t know how to adjust the page breaks/page flow; don’t think this is possible actually (?). I plan the content carefully in advance (by spending time developing a detailed outline). Then, I make sure that each topic simply fits on its own page.
You’re certainly welcome to continue using Word! Or, Publisher. But PowerPoint does tend to be easiest to use as you add more visuals to your reports.
Good luck! Ann
Thanks. When do u prefer portrait or landscape orientation?
I’m trying to use landscape as much as possible these days — since so many people are reading the reports from their computers.
Interesting but I fail to see the benefit. Why not just use Word with PowerPoint inserts for powerful reports (or for that matter insert PowerBI).
I just find PowerPoint to be more artistic since it requires so much careful manipulation of content – an issue I simply don’t have in Word.
Word’s great for text-heavy reports. PowerPoint’s great for visual-heavy reports. They each have their own value.
Leave a Reply Cancel reply
Your email address will not be published. Required fields are marked *
Save my name, email, and website in this browser for the next time I comment.
How to Write Your Reports in PowerPoint Instead of Word: Nine Tips for Getting Started

Hi! My name is Nick Visscher, I’m an internal evaluator with Denver Zoo. Our data work spans the gamut from collecting guest satisfaction insights to observing preschool kids in our nature play programming. With everything our team does we aim to help our staff improve their programs and our guest’s experience. It’s important for us to disseminate our findings in ways that make our stakeholders (mainly internal staff) to dig in and explore. Clear, concise, and well visualized reporting is super important and something we are passionate about.

There are so many options when it comes to reporting software, but one familiar face I often find myself turning to is Microsoft PowerPoint. You might not immediately think of PowerPoint when it comes to creating formal reports, but I love using it in lieu of more common applications like Word. Positioning new images and text boxes into a document is just easier in PowerPoint. You don’t need to worry about anchoring items or how inserting new text might change the position of items you’ve already included on a page. It’s a blank canvas without many limitations.
Here are some screenshots from a report that I wrote in PowerPoint. These pages come from our Lorikeet Adventure: Guest Experience Research Brief.

Here are a few tips I keep in mind when using PowerPoint to design my evaluation reports. Note: I’m working in MS Office 2016.
- Changing slide orientation : I like a traditional page layout for a report I know my readers will likely print, not the default slide size (16:9 aspect ratio). To change it, I go to the Design pane and create a custom slide size, change the settings to 8.5” by 11”, and select a Portrait orientation.
- Making use of the page ruler, gridlines, and guides : In the View pane I always select Ruler and Guides (and sometime Gridlines) so I can make sure key text and objects are in the same position on each page. I also know my readers will likely print and use a staple in the upper left corner so I make sure to keep one guide line at a half inch from the left. This lets me position headers and text where I know a staple won’t get in the way.
- Using built in arrangement options for multiple text boxes or images : Don’t spend too much time clicking that left arrow or right arrow to “nudge” objects into just the right place on a page. Select all the objects you wish to align, go to the Home pane, select Arrange, and then select Align. There are built in arrangement options there which perfectly align or evenly distribute everything at once. This is one feature that consistently saves me time and makes everything look better.
- Inserting shapes and lines as design elements : I love using basic shapes and lines in different variations on a page to give the design of a report a sleek and professional feel. I avoid predefined slide design templates at all costs, they don’t often follow the principles of good design.
- Using fill color and transparency : I’m not always confident in knowing which colors compliment each other so to avoid having to pick different colors, but still give some visual variation, I increase the degree of fill color transparency on key shapes or objects. I also like doing this on cover pages when most often the entire slide background is a photograph. Inserting overlapping shapes with 50% transparency creates a sophisticated visual effect and also adds some darker space on the page perfect for a title or text header to stand out.
- Copying page design for the whole report : Most of the time I like my background design and title text to be consistent on each page. Once I’ve created a page layout I like I simply copy and paste that slide for the remainder of the report pages. This is a quick solution to having to re-create the most common design elements in your report over and over again. I’ve used a more elegant solution lately by editing the slide master in the View pane and editing the default fonts and colors in the Design pane.
- Editing dataviz directly in PowerPoint : I used to spend a lot of time editing charts directly in Excel, then copy/pasting them into PowerPoint. This would sometimes cause size and formatting issues so I’d have to do a few edits there too. PowerPoint has the same chart editing and layout features as Excel does so now I create a basic default chart in Excel using my data, copy/paste that right away into PowerPoint, and do all of my editing there.
- Letting your copy editor do their thing : I always need a copy editor when I finish a report. PowerPoint provides similar review and comment features as Word does. It’s not quite as extensive but it does the trick. Under the Review pane you can select text, add comments, and select “start inking” to highlight areas is the report that need further attention.
- Saving your report : Save your report as a PDF or XPS document when you’re ready to send to your readers. They’ll be dazzled by the beauty of your work and be none the wiser that you used trusty ole PowerPoint to design it.
Here’s another report that I designed within PowerPoint. These pages come from our Zoo Lights: Guest Experience Survey Report .

Have you tried writing your reports in PowerPoint instead of in Word? If so, please share your tips in the comments section below.
You Might Like
Soar beyond the dusty shelf report, redesigning a thesis chapter, report redesign.
- First Name *
Work design magic with Word templates
Weave a little wow into your next document when you work with a customizable design template for word. from professional documents to schoolwork, there's a word template that'll take your next project to the next level..
Showcase your best work with professional and easily customizable templates designed to help you land your next gig.

Share best wishes, say thanks, or send holiday greetings with custom cards for any occasion. Find a template and make it yours with no design experience needed.

Get the word out for your next event, show, project with easily customizable flyer templates. Find inspired designs to match your aesthetic or brand.

Market your next event, meeting, or product using brochure templates you can customize in a flash. You can also use templates to make menus, share your research, advertise your next class, and more—the options are endless.

Find professional templates for formatting and writing important letters, from custom letterheads to recommendation and reference letter requests.

Certificates
From gift certificates to employee of the month awards, find easily customizable certificate templates designed to highlight achievements.

Start with the best Word templates

A hassle-free way to create custom, beautiful Word documents
Create useful and inviting templates for resumes, cover letters, cards, flyers, brochures, letters, certificates, and more with no design experience needed. Here's how:

1. Find your perfect Word template
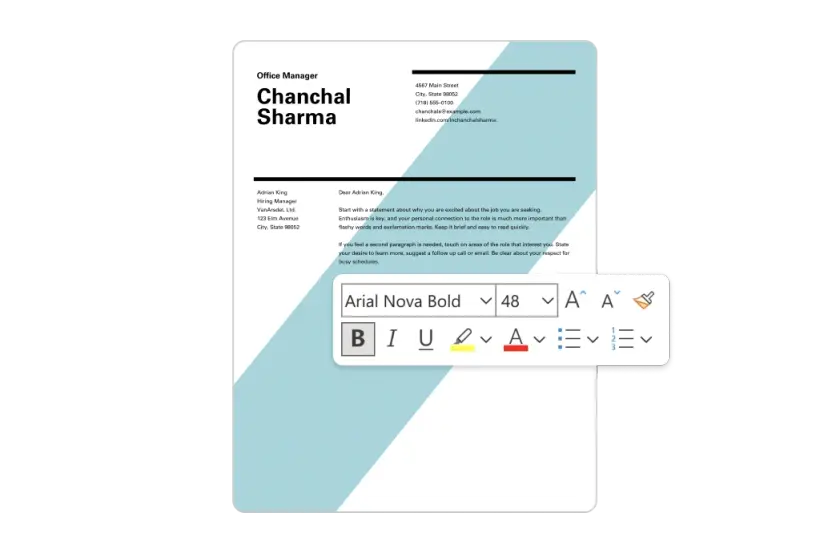
2. Customize your creation
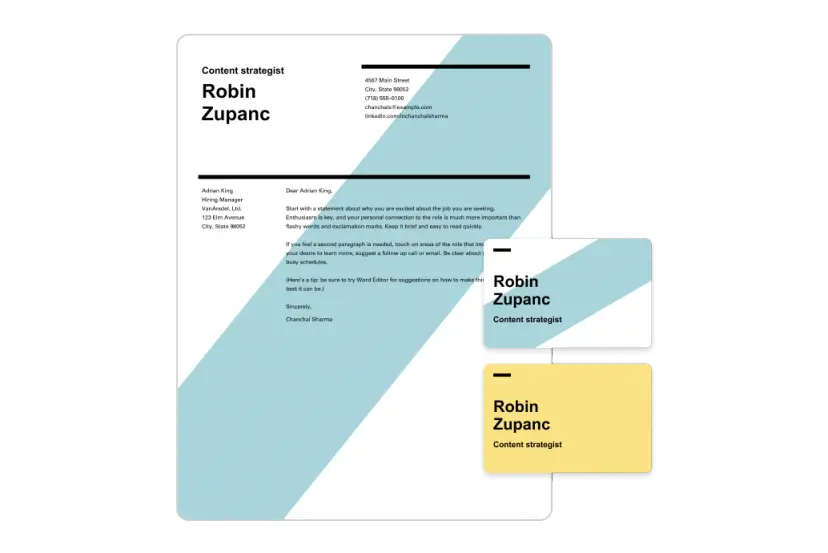
3. Show it off
Let's create something in word, frequently asked questions, what can i use word document templates for.
You can use Word document templates to design resumes , create business invoices , customize annual calendars , and more. There are also templates that you can use throughout your business's internal operations. Use Word document templates to create a business plan , design and share your org chart, and make printable letter head .
How do I create or customize templates for Word?
You can make your own Word document templates from scratch. Create documents that fit your exact needs since the options are limitless when using Word. If you don't know how to begin, you can also edit existing templates and customize them so that their content, colors, fonts, and media are curated for you.
Where do I find Word templates?
You can find Word templates by using the search bar. When you search "Word," a variety of templates will come up in the results. You can customize their colors, text, media, and more.
Popular categories

Home Blog Presentation Ideas Powerful Words to Use in Presentations: Ultra Long List
Powerful Words to Use in Presentations: Ultra Long List

The power of words is immense and palpable when it comes to sharing ideas with others. The way you frame your sentences and cherry-pick specific words will affect how the audience preserves you. Not just that. Well-selected power words can shape narratives around businesses, distort (positively and negatively) their perception, and impact the listener’s decision to purchase. That’s why top copywriters and public speakers alike spend a great deal of time brainstorming different word combos and obsessing over their selection of action verbs, adjectives, and linking phrases.
Granted, you no longer need to do that. Just grab a PowerPoint template of your choice and start populating it with our big list of power words!
What are Power Words?
Power words are persuasive words and phrases that evoke a positive or negative emotional response. Our selection of verbs, adjectives, and adverbs can convey different emotions from slight excitement to rightful outrate. That’s why public speakers , authors, and copywriters always carefully choose their words to convey the right idea and sentiment.
Power words and phrases can make the same idea sound very different. Let’s take Apple’s famous slogan as an example: Think different.
You can also convey the same idea using other descriptive words: Don’t think like everybody else, think outside the box, be creative

However, each variation has a somewhat different ring to it. Ultimately, your word choice also impacts how others perceive you based on your speech.
Researchers found that word selection can have a massive impact on people, businesses, and society as a whole. Individual word choices can indicate the speaker’s mental state and impact the outcomes of a negotiation. Business power words shape customer experience with the brand and affect conversions. Action words, chose by the media, influence public perception of a social issue.
Interestingly a group of researchers from Wilfrid Laurier University in Canada and Wharton in the US also found that word choices impact the song’s popularity. By applying text mining analytics to Billboard charts, the group found that songs with somewhat more unique texts performed better than those with pretty standard lyrics. A 16% differentiation in lyrical topics within a song was enough to propel it higher than songs in similar genres.
The takeaway:
Our word choices have a profound impact on how others perceive us, as well as the actions they take afterward. Thus, if you want to be a Rockstar presenter , you need to choose your words carefully and prioritize powerful words!

List of Powerful Words to Use in Presentations
The English language has about 170,000 words in use . But an average person has an active vocabulary of 20,000 – 30,000 words. Among them is a smaller range of powerful adjectives and action verbs to make your presentations and speeches more impactful.
Action Verbs to Use in Your PowerPoint Presentation
As the name implies, action verbs denote some dynamics — state, movement, result, etc. We use action verbs in our everyday speech a lot to describe what and how we do things. As author Elwyn Brooks White suggests :
“Write with nouns and verbs, not with adjectives and adverbs. The adjective hasn’t been built that can pull a weak or inaccurate noun out of a tight place.”
Strong verbs don’t need adverbs to reinforce them. Compare these two statements:
- I walked quickly towards the door.
- I rushed out of the door.
The first sentence merely states the fact. But the second one better conveys the emotion, the urgency of getting out of the room. It adds color to the narrative and sets the right mood.
In business presentations, action verbs help imply action to the user. They are good to use for both throughout the copy and the closing slide when you describe:
- Main action points
- Accomplishments
- Next steps
- Results
As you proofread your slide deck, look for weaker verbs and then replace them with stronger synonyms. Some common offenders include:
- State-of-being verbs such as am, does, do, could, might, etc. While they have their merit, oftentimes, you can find a more descriptive alternative, conveying an extra emotion.
- Verbs ending in -ing : wishing, planning, forgetting. Be bolder. Use present or past tenses instead.
- Verbs in conjunction with an adjective: walked quickly, talked loudly, etc. Again, these can be replaced with snappier one-word alternatives.
List of powerful verbs to make your language more persuasive:
- Accelerate
- Alter
- Maintain
- Regard
- Convince
- Boost
- Ignite
- Surge
- Disrupt
- Rejuvenate
- Smash
- Supercharge
- Report
- Change
- Explore
- Re-define
- Strategize
- Maximize
- Capture
- Achieve

Powerful Adjectives to Use In Your Presentation
The goal of adjectives is to reinforce your nouns and verbs. Use them to convey specific emotions and set the scene for the audience.
But be sparring. You are not writing a novel. Too many adjectives can make your slide deck look cluttered, as you’d have to skim on white space to fit longer sentences. Also, excessive use of adjectives can muddle the main idea behind your key statements.
Below is our quick collection of power adjectives you can use to punch up your presentation:
Power Words for Motivation
- Awe-inspiring
- Exquisite
- Blissful
- Brilliant
- Dynamic
- Burgeoning
- Breathtaking
- Accomplished
- Successful
- Enterprising
- Venturesome
- Life-changing
- Encouraging
- Baffling
- Sensational
- Incredible
Power Words for Sales (Adjectives)
- Cost-effective
- Exorbitant
- Knock-out
- Science-proofed
- Limited-time
- Fully-booked
- Refundable
- Negotiable
- Below market average
- Too-good-to-miss
- Budget-friendly
- Optimal
- Exclusive
- Time-sensitive
- Efficacious
- Sensible
- Stylish
- Unique
- Profitable
Power Adjectives to Persuade
- Verified
- Risk-free
- Effective
- Tested
- Solution-oriented
- Vetted
- Non-negotiable
- Quality-controlled
- Reliable
- Legitimate
- Lifetime
- Market-tested
- Foolproof
- Surefire
- Ingenious
- Innovative
- Cutting-edge
- Exceptional
- Game-changing
- Ground-breaking
- Flagship
- Assured
- Collateralized
- Painless
- Diciest
- Tamperproof
- Immutable
Coherence Markers
Coherence markers are conversational words and phrases we use to denote logical connections between different ideas. They are not meaningful standalone words. Yet, they play a huge role in making your presentation copy more compelling.
Take a look at these two versions of Dove ad copy:
- Your skin’s natural oils keep it silky and supple. As you age, it becomes less elastic, and the production of oil slows down. Aging can cause dull, dehydrated skin.
- Your skin’s natural oils keep it silky and supple. But as you age, your skin becomes less elastic, and the production of oil slows down. That is why aging can cause dull, dehydrated skin.
The bolded coherence markers help digest the claims by establishing logical connections between the ideas. Research shows that adding such links to any copy (or speech) improves clarity and boosts persuasion. Therefore, sprinkle some coherence markers in your presentation to help the reader or lister mentally justify what you are saying.
Coherence Markers to Use in a Presentation
- Now do it
- So go ahead
- Due to
- That’s why
- Given that
- Here’s the deal:
- That’s right
- By contrast
- Beyond that
- For starters
- What’s the bottom line?
- You might be wondering
- By now you should
- Better still…
- The general conclusion is that
- Compound this with
- What does this mean for you?
- Inferring from above
- Just imagine
- You’ve tried everything. But
- You start to worry that
- Let me guess
- What’s the catch?
- I know that’s what you’re thinking, right?
- But one thing’s for sure
- Let me say this straight
- Now consider it this way
- It gest better (or worse)
- But here’s the kicker
- As if that’s not enough
- Best of all
Metaphors
A metaphor is a figure of speech used to represent or symbolize another object or concept. For example, time is the greatest gift given to you .
Writers love using metaphors to act depth and eloquence to their narrative. At the same time, top presenters use these to help the reader picture an intangible concept.
As research found, metaphors help with persuasion by helping the reader or listener form a concrete mental image of the discussed concept. For example, you can say that your printing equipment works fast. But how fast do you mean? A metaphor can help make it more clear, e.g., “Our printing machines an equivalent of Ferrari in terms of speed.”
Check our complete guide to using metaphors in presentations for more insights. Or swipe of some of the examples from our list below:

Metaphors for Professional Presentations
- Zeus-like
- Drag-and-drop interfaces
- To be worth waiting for
- Glue for the Internet
- To stay afloat
- Off the shelf
- Custom-made
- To get up to speed
- App-like functionality
- blue ocean / red ocean
- Bumps on the road
- Jump on the bandwagon
- Tossed its cap
- The veneer on the credenza.
- Moonshot project
- More complicated than one-color puzzles.
- Lion-tamer-sky-diver fun
- Pack a punch
- At the foothold of new
- Buckets of questions
- Going against the grain
- The epitome of something else
- From full throttle to a halt
To Conclude
Positive power words speak straight to the hearts and minds of the audiences. They encourage, inspire, motivate, bring up, and help move on in the right direction. If your goal is to hammer in a clear idea and prompt subsequent desirable action, these words are your best buddies to use all through your presentation slides and during delivery!
1. 12 Tips List PowerPoint Templates

If you´re searching for a PowerPoint Template that is very flexible and can be used to create lists, the 12 Tips List PowerPoint Template is a great choice.
Use This Template

Like this article? Please share
Presentation Approaches, Presentation Ideas, Presentation Skills, Presentation Tips, Speech, Word Cloud Filed under Presentation Ideas
Related Articles

Filed under Design • March 27th, 2024
How to Make a Presentation Graph
Detailed step-by-step instructions to master the art of how to make a presentation graph in PowerPoint and Google Slides. Check it out!

Filed under Google Slides Tutorials • March 22nd, 2024
How to Share a Google Slides Presentation
Optimize your presentation delivery as we explore how to share a Google Slides presentation. A must-read for traveling presenters.

Filed under Presentation Ideas • February 29th, 2024
How to Make a Fundraising Presentation (with Thermometer Templates & Slides)
Meet a new framework to design fundraising presentations by harnessing the power of fundraising thermometer templates. Detailed guide with examples.
One Response to “Powerful Words to Use in Presentations: Ultra Long List ”
Great article! it helped me ALOT. Thank you.
Leave a Reply
Enter your email address below and we'll send you password reset instructions.
- Audio Converter
- Video Converter
- Image Converter
- Document Converter
- Archive Converter
- Presentation Converter
- Font Converter
- Ebook Converter
DOC (WORD) to PPT Converter
Convert your doc files to ppt online & free.
- Presentation
Microsoft Word Document
Microsoft powerpoint 97/2000/xp, how to convert doc to ppt, upload doc-file(s).
Select files from Computer, Google Drive, Dropbox, URL or by dragging it on the page.
Choose "to ppt"
Choose ppt or any other format you need as a result (more than 200 formats supported)
Download your ppt
Let the file convert and you can download your ppt file right afterwards
DOC to PPT Quality Rating
- Case Report
- Open access
- Published: 28 March 2024
Unusual presentation and delayed diagnosis of cardiac angiosarcoma
- Salman Zaheer 1 ,
- Alice L. Zhou 1 ,
- John M. Gross 2 &
- Ahmet Kilic 1
Journal of Cardiothoracic Surgery volume 19 , Article number: 161 ( 2024 ) Cite this article
53 Accesses
Metrics details
Primary cardiac angiosarcomas are very rare and present aggressively with high rates of metastasis. Given the poor prognosis, particularly once disease has spread, early diagnosis and multidisciplinary treatment is essential.
Case presentation
We present the case of a 46-year-old male who presented with chest pain, intermittent fevers, and dyspnea. Workup with computed tomography scan and transesophageal echocardiography demonstrated a right atrial pseudoaneurysm. Given the concern for rupture, the patient was taken to the operating room, where resection of the pseudoaneurysm and repair using a bovine pericardial patch was performed. Histopathology report initially demonstrated perivascular lymphocyte infiltrate. Six weeks later, the patient represented with chest pain and new word finding difficulty. Workup revealed multiple solid lung, pericardial, brain, and bone nodules. Eventual biopsy of a cardiophrenic nodule demonstrated angiosarcoma, and rereview of the original pathology slides confirmed the diagnosis of primary cardiac angiosarcoma.
Conclusions
Primary cardiac angiosarcomas are often misdiagnosed given the rarity of these tumors, but early diagnosis and initiation of treatment is essential. The unique presentation of our case demonstrates that clinical suspicion for cardiac angiosarcoma should be maintained for spontaneous pseudoaneurysm originating from the right atrium.
Peer Review reports
Primary cardiac angiosarcomas are very aggressive tumors that often present after metastatic spread. Given the aggressive nature of the disease, early diagnosis is essential. We describe the case of a patient with primary cardiac angiosarcoma who initially presented with a right atrial pseudoaneurysm.
We present a case of 46-year-old male with no pertinent past medical history who presented to the emergency department with ongoing chest pain for 9 days associated with intermittent fevers and shortness of breath. On examination, the patient had a heart rate of 88 beats per minute and blood pressure of 143/72 mmHg. There were no audible murmurs or rubs on auscultation. He endorsed ongoing chest pain and shortness of breath.
The patient underwent contrast computed tomography (CT) angiography pulmonary embolism with pulmonary arterial phase timing that showed no evidence of pulmonary embolism, but demonstrated a moderate sized pericardial effusion with high density concerning for hemopericardium, along with an outpouching on the right atrial wall with a narrow neck concerning for a pseudoaneurysm (Fig. 1 ). Further workup, including lab work and an electrocardiogram, were unremarkable. Transesophageal echocardiogram (TEE) redemonstrated the pericardial effusion and right atrial pseudoaneurysm (Fig. 2 ).

Computed tomography angiogram of the chest. Computed tomography angiogram showing a right atrial pseudoaneurysm. Neck of the pseudoaneurysm is shown by the green arrow. Attenuation of the pericardial fluid was 28.4 Hounsfield units

Transesophageal echocardiogram of pseudoaneurysm. Pseudoaneurysm with pericardial effusion redemonstrated on transesophageal echocardiogram arising from right atrium
The case was discussed at the multidisciplinary cardiac conference and the decision was made to take the patient to the operating room given his ongoing symptoms as well as concern for hemopericardium and rupture of pseudoaneurysm into the pericardial space. Cardiac magnetic resonance imaging (MRI) and positron emission tomography (PET) CT were not performed given time-sensitive nature of the case and the desire for tissue diagnosis. The operation was performed via median sternotomy with cardiopulmonary bypass. A pericardial effusion and dense pericardial adhesions were found intraoperatively. After meticulous lysis of adhesions, central cannulation was performed, and the aorta and right atrium were cannulated. Right atrial pseudoaneurysm was identified (Fig. 3 ) and excised with the surrounding atrial wall. The defect in the atrial wall was closed using a bovine pericardial patch. Full exploration of the chest revealed no other lesions. The resected specimen was sent for pathology to try to establish tissue diagnosis and the patient was closed. The patient’s post-operative course was unremarkable, and he was discharged home on post operative day 4. Operative cultures showed no growth. Pericardial fluid cytopathology demonstrated abundant mixed inflammation with eosinophils, reactive mesothelial cells, histiocytes, and lymphocytes, with no malignant neoplasm identified. Tissue histopathology demonstrated granulation tissue, perivascular lymphocyte infiltrate, dense fibrous tissue, focal calcification, and organizing fibrin thrombus, but no evidence of malignancy.

Intra-operative photos of pseudoaneurysm. Pseudoaneurysm demonstrated by green arrow. A Blue arrow indicates pseudoaneurysm. B Green arrow indicates bovine pericardial patch used to repair defect in atrial wall after pseudoaneurysm resection
Six weeks postoperatively, the patient presented to emergency department with chest pain, new word finding difficulty, clumsiness, gait instability, and intermittent low-grade fevers. A CT chest scan showed multiple halo-like solid lung, pericardial, and bone nodules (Fig. 4 A, B ). The CT head scan showed 1–1.5 cm left anterior thalamic and left temporal lobe hemorrhagic lesions. Magnetic resonance imaging of the brain demonstrated multiple enhancing lesions in the left temporal lobe, left anterior thalamus, and right parietal lobe (Fig. 4 C). Together, the findings were suspicious for hemorrhagic metastasis, invasive fungal infection (such as invasive aspergillosis), or septic emboli. Given the concern for metastatic process, a biopsy of a lung nodule was performed and showed focal organizing exudative and fibrotic pneumonia negative for carcinoma. A lumbar puncture was also performed and showed no malignant neoplasm. Given the repeated surgical specimens that were negative for malignancy, an extensive infectious and rheumatologic workup was pursued. He was discharged with outpatient infectious disease follow-up, as the most likely diagnosis on the differential was thought to be invasive fungal infection and cultures would take several weeks to result.

Imaging findings on representation. A Computed tomography (CT) of chest showing multiple lung nodules (green arrows). B CT of chest showing nodular appearance of pericardial effusion and outpouching of the right atrium. C Head magnetic resonance imaging (MRI) demonstrating peripherally enhancing lesions (red arrow)
He represented one week later with returned right-sided chest pain, intermittent headaches, and abdominal pain. Repeat CT scan demonstrated increased number of pulmonary and pericardial nodules. Given the patient’s diagnostic dilemma and ongoing symptoms, a cardiophrenic nodule was biopsied with image guidance. Pathology demonstrated atypical cells, anaplasia, and poorly-formed vascular lumina, suggestive of angiosarcoma (Fig. 5 ).

Pathology findings demonstrating angiosarcoma. A low power magnification (× 12.5) hematoxylin and eosin staining of pseudoaneurysm reveals fibrin and organizing hematoma with a variably cellular fibrous cyst wall. B High power magnification (× 400) of pseudoaneurysm reveals scattered enlarged pleomorphic tumor cells with rare atypical mitoses in the background of abundant reactive granulation tissue. C Cardiophrenic nodule (× 400) shows similar atypical cells with unequivocal anaplasia and poorly-formed vascular lumina. D Cardiophrenic nodule (× 400) shows malignant endothelial cells with endothelial hobnailing into the vascular lumen
The patient’s tissue biopsy from his initial right atrial pseudoaneurysm resection was retrospectively reviewed and similar atypical cells were noted in the background of granulation tissue and organizing thrombus (Fig. 5 ). A diagnosis of primary cardiac angiosarcoma was made. The patient is currently undergoing chemotherapy with weekly paclitaxel for metastatic cardiac angiosarcoma.
Discussion and conclusions
Primary tumors of the heart are very rare and are identified in only 1 in 500 cardiac surgical cases. Of these, malignant tumors make up only 25%, the majority (95%) of which are cardiac sarcomas [ 1 ]. Angiosarcomas are the most common histologic subtype of cardiac sarcomas (30%) and are very aggressive in nature with high rates of metastasis [ 2 ].
Cardiac angiosarcomas more frequently present in males (2–3:1 male:female ratio) and most commonly arise from the right atrium [ 3 ]. Patients often present with nonspecific symptoms such as chest pain, dyspnea, weight loss, and fatigue [ 1 ]. Later in the disease course, patients may present with more specific symptoms, such as pericardial effusion, due to local infiltration into the myocardium and neighboring structures. Over half of patients present with metastatic disease, with spread to the lungs or pleura being most common [ 3 ]. Imaging can aid in the diagnosis of cardiac angiosarcomas. CT scan often shows a large multilobular mass that comprises the majority of the right atrium [ 4 ]. Transthoracic echocardiography (TTE) often shows a large echogenic mass with poorly defined borders and can be used to understand the size and location of the mass, understand its relation to other structures, and determine if cardiac function is affected [ 5 ]. Magnetic resonance imaging (MRI) can be used to differentiate between thrombus and tumor [ 6 ]. Histopathologically, angiosarcomas are difficult to diagnose due to the cellular heterogeneity. Common tumor markers include CD34, CD31, and factor VIII [ 1 ].
Due to the aggressive nature of this cancer, early diagnosis is essential. Our case represented a diagnostic challenge and initially presented on imaging as a right atrial pseudoaneurysm with a narrow neck, as opposed to a large multilobular mass with broad-based attachment typically described for cardiac angiosarcoma [ 4 , 5 ]. Diagnosis was further delayed by the challenging histologic presentation in the context of low clinical suspicion, with malignant cells being obscured by extensive fibrin, granulation tissue, and organizing thrombus. Given these difficulties, diagnosis was not made until after distant metastatic spread and a cardiophrenic metastatic lesion was biopsied.
Given the rarity of this tumor and high mortality rate, there is no standardized approach to treatment. Without surgical resection, average survival is about 4 months [ 1 ]. The mainstay of treatment involves complete surgical resection, with a median post-operative survival of about 14 months [ 1 , 3 ]. However, achieving complete resection with negative margins is often difficult given the diagnostic delay and proximity to vascular structures and propensity for distant microscopic spread at time of diagnosis. Chemotherapy and radiation are often used in the treatment either as neoadjuvant or adjuvant therapy, but the exact role of these modalities remains unknown [ 7 , 8 ]. Overall, a multidisciplinary approach involving local resection, systemic chemotherapy, and radiation therapy seems to be the most favorable strategy.
Primary cardiac angiosarcomas are often misdiagnosed given the rarity of these tumors. Cardiac angiosarcoma presenting initially on imaging as either a right atrial pseudoaneurysm or a right coronary artery aneurysm has only been reported in a handful of case reports [ 9 , 10 , 11 , 12 , 13 , 14 ]. The unique presentation of this case demonstrates that clinical suspicion for cardiac angiosarcoma should be maintained for spontaneous pseudoaneurysm originating from the right atrium. With an aggressive disease course, early diagnosis is vital and allows for multidisciplinary care with medical and radiation oncology to offer patients the best chances of survival.
Availability of data and materials
Not applicable.
Abbreviations
Computed tomography
Magnetic resonance imaging
Positron emission tomography
Transesophageal echocardiogram
Transthoracic echocardiography
Patel SD, Peterson A, Bartczak A, et al. Primary cardiac angiosarcoma—a review. Med Sci Monit. 2014;20:103–9. https://doi.org/10.12659/MSM.889875 .
Article CAS PubMed PubMed Central Google Scholar
Ferguson PC. Surgical considerations for management of distal extremity soft tissue sarcomas. Curr Opin Oncol. 2005;17(4):366–9. https://doi.org/10.1097/01.cco.0000166651.38417.c8 .
Article PubMed Google Scholar
Look Hong NJ, Pandalai PK, Hornick JL, et al. Cardiac angiosarcoma management and outcomes: 20-year single-institution experience. Ann Surg Oncol. 2012;19(8):2707–15. https://doi.org/10.1245/s10434-012-2334-2 .
Kassop D, Donovan MS, Cheezum MK, et al. Cardiac masses on cardiac CT: a review. Curr Cardiovasc Imaging Rep. 2014;7(8):9281. https://doi.org/10.1007/s12410-014-9281-1 .
Article PubMed PubMed Central Google Scholar
Luo L, Zhao W, Wang Y, Liu K. Cardiac angiosarcoma: a case report and review of the literature. Echocardiography. 2021;38(12):2083–90. https://doi.org/10.1111/echo.15221 .
Riles E, Gupta S, Wang DD, Tobin K. Primary cardiac angiosarcoma: a diagnostic challenge in a young man with recurrent pericardial effusions. Exp Clin Cardiol. 2012;17(1):39–42.
PubMed PubMed Central Google Scholar
Penel N, Bui BN, Bay JO, et al. Phase II trial of weekly paclitaxel for unresectable angiosarcoma: the ANGIOTAX study. JCO. 2008;26(32):5269–74. https://doi.org/10.1200/JCO.2008.17.3146 .
Article CAS Google Scholar
Blackmon SH, Reardon MJ. Surgical treatment of primary cardiac sarcomas. Tex Heart Inst J. 2009;36(5):451–2.
Sawamura T, Takiya H, Yamada T, Sugimoto H, Kawai H. A case of cardiac angiosarcoma with a pseudoaneurysm formed in the right coronary artery. Kyobu Geka. 1994;47(7):565–8.
CAS PubMed Google Scholar
Serra V, Moura L, Almería C, Pérez de Isla L, Zamorano J. Right atrial rupture. Rev Port Cardiol. 2004;23(5):731–6.
PubMed Google Scholar
Berry MF, Williams M, Welsby I, Lin S. Cardiac angiosarcoma presenting with right coronary artery pseudoaneurysm. J Cardiothorac Vasc Anesth. 2010;24(4):633–5. https://doi.org/10.1053/j.jvca.2009.04.002 .
Chaturvedi A, Vummidi D, Shuman WP, Dubinsky TJ, Maki JH. Cardiac angiosarcoma: an unusual cause of coronary artery pseudoaneurysm. J Thorac Imaging. 2012;27(1):W8. https://doi.org/10.1097/RTI.0b013e3182078187 .
Kimura S, Yonekura R, Umesue M. Angiosarcoma mimicking an infected pseudoaneurysm after graft replacement. Ann Thorac Surg. 2015;100(3):1114. https://doi.org/10.1016/j.athoracsur.2015.05.084 .
Murthy JSN, Gorantla R, Periyasamy T, et al. Right atrial angiosarcoma presenting as giant pseudoaneurysm with impending rupture. IHJ Cardiovasc Case Rep. 2017;1(3):165–8. https://doi.org/10.1016/j.ihjccr.2016.09.002 .
Article Google Scholar
Download references
Acknowledgements
Author information, authors and affiliations.
Division of Cardiac Surgery, Department of Surgery, The Johns Hopkins Hospital, Baltimore, MD, USA
Salman Zaheer, Alice L. Zhou & Ahmet Kilic
Bone and Soft Tissue Pathology, The Johns Hopkins Hospital, 1800 Orleans Street, Zayed Tower Suite 7107, Baltimore, MD, 21287, USA
John M. Gross
You can also search for this author in PubMed Google Scholar
Contributions
SZ: Concept/design, drafting article, critical revision of article, approval of article. AZ: Drafting article, critical revision of article, approval of article. JG: pathological examination of the tumor sample, drafting of the article, critical revision of the article, and approval of the article. AK: Concept/design, critical revision of article, approval of article. All authors read and approved the final manuscript.
Corresponding authors
Correspondence to Salman Zaheer or Ahmet Kilic .
Ethics declarations
Ethics approval and consent to participate, consent for publication.
Consent was obtained from the patient for the publication of this report.
Competing interests
Additional information, publisher's note.
Springer Nature remains neutral with regard to jurisdictional claims in published maps and institutional affiliations.
Rights and permissions
Open Access This article is licensed under a Creative Commons Attribution 4.0 International License, which permits use, sharing, adaptation, distribution and reproduction in any medium or format, as long as you give appropriate credit to the original author(s) and the source, provide a link to the Creative Commons licence, and indicate if changes were made. The images or other third party material in this article are included in the article's Creative Commons licence, unless indicated otherwise in a credit line to the material. If material is not included in the article's Creative Commons licence and your intended use is not permitted by statutory regulation or exceeds the permitted use, you will need to obtain permission directly from the copyright holder. To view a copy of this licence, visit http://creativecommons.org/licenses/by/4.0/ . The Creative Commons Public Domain Dedication waiver ( http://creativecommons.org/publicdomain/zero/1.0/ ) applies to the data made available in this article, unless otherwise stated in a credit line to the data.
Reprints and permissions
About this article
Cite this article.
Zaheer, S., Zhou, A.L., Gross, J.M. et al. Unusual presentation and delayed diagnosis of cardiac angiosarcoma. J Cardiothorac Surg 19 , 161 (2024). https://doi.org/10.1186/s13019-024-02555-8
Download citation
Received : 21 April 2023
Accepted : 30 January 2024
Published : 28 March 2024
DOI : https://doi.org/10.1186/s13019-024-02555-8
Share this article
Anyone you share the following link with will be able to read this content:
Sorry, a shareable link is not currently available for this article.
Provided by the Springer Nature SharedIt content-sharing initiative
- Cardiac tumor
- Pseudoaneurysm
- Angiosarcoma
- Tumor resection
- Case report
Journal of Cardiothoracic Surgery
ISSN: 1749-8090
- General enquiries: [email protected]
IMAGES
VIDEO
COMMENTS
Your papers and reports will look as professional and well put together as they sound when you compose them using customizable Word templates.Whether you're writing a research paper for your university course or putting together a high priority presentation, designer-created templates are here to help you get started.First impressions are important, even for papers, and layout can make or ...
In Microsoft Word: Go to Home > Paste > Paste Special. Select Paste Special and from the dialog select Microsoft Office Excel Worksheet Object. You can resize the data as it was an image, and if you double click, you will be able to edit the values. You can change the table or chart and redesign it.
Head to the Microsoft Office online website, sign in to your account, and open your document in Word. You do not have to open PowerPoint in another tab or window. Click File > Export and choose the "Export to PowerPoint Presentation" option. You'll see a pop-up window with a collection of themes. Select the theme that you want to use and click ...
Business Microsoft Word Report Templates. Choose from 24 included pages in this awesome business report template. It includes files for Microsoft Word, as well as PDF and InDesign files too. It also uses free fonts that you can easily download and use within the template (and elsewhere!). Staff Pick.
How to add text to your presentation report slide. Click on the Text Box button. Draw a box on the slide where you want the new text box to appear. You'll know if you've created a new text box by the handles that appear around the box. After you've drawn the box, add new text to your slide. 5.
In the Word window, select a header in your document. While the header is selected, in the "Styles" section at the top of the Word window, click the "Heading 1" style. Do this for all the headers in your document. Next, select the paragraph beneath your header. Then, in the "Styles" section at the top, click "More," and then select "Heading 2."
One person. Sharing and real-time collaboration. PowerPoint for the web and PowerPoint desktop app for offline use. Premium templates, fonts, icons, and stickers with thousands of options to choose from. Dictation, voice commands, and transcription. Advanced spelling and grammar, in-app learning tips, use in 20+ languages, and more.
Professional report formatting in Word. This is a complete guide on how I like to set up the formatting of a Word document for a professional feel.This guide...
Superfast presentation creation. Elevate your presentations with our AI-powered Word to PPT converter. Effortlessly turn Word documents into compelling PowerPoint slides using advanced AI summarization. Perfect for creating impactful presentations for business, academic, or personal projects.
Template 2: Work Completion Report PPT Template. This Work Completion Report Template offers eight distinct formats. The Construction Project Work Completion Report tracks tasks with statuses (in process, due, completed), focusing on the handover of deliverables, client sign-offs, financial processes, and project member evaluations.
The sales report sample template below comes with enough slides with charts to get your data organized nicely. Using the Visme editor, add slides in between the sample template slides to add explanatory content if necessary. Take advantage of Visme analytics to see how your report is performing.
It's our job to make that process as short and simple as possible. We're sharing six creative guidelines that we use to do this within our work, and that could help give professional finesse to your own report design. 01. Add a page header. Including a page header in your report design is a simple but effective feature.
Writing a Research Report: Presentation. Tables, Diagrams, Photos, and Maps. - Use when relevant and refer to them in the text. - Redraw diagrams rather than copying them directly. - Place at appropriate points in the text. - Select the most appropriate device. - List in contents at beginning of the report.
The main difference between a Presentation and Report Writing is that a report is usually fairly extensive and gives a detailed account of the information on a particular topic. Whereas, a presentation is mostly a synopsis which highlights the key points that are important for the audience. Since one of the key objectives of both - a ...
Great post, thank you. As a consultant I write reports for a living. I grew up on Word and was trained to write word-heavy, long form reports. Whilst I (think I) do that very well, I'm conscious that these days many people prefer shorter, more visual reports so I'm exploring how I might transition to that.
Report Template in Word. Write professional reports with free report templates in Word at Template.net. make monthly, summary, expense, weekly, left bound, and project reports with editable design, format, and text. Enjoy expertly written sample content on each document - Click that download button now! Get Access to All MS Word Templates.
A hassle-free way to create custom, beautiful Word documents. Create useful and inviting templates for resumes, cover letters, cards, flyers, brochures, letters, certificates, and more with no design experience needed. Here's how: 1. Find your perfect Word template. Search documents by type or topic, or take a look around by browsing the catalog.
Power words and phrases can make the same idea sound very different. Let's take Apple's famous slogan as an example: Think different. You can also convey the same idea using other descriptive words: Don't think like everybody else, think outside the box, be creative. Source: 12 Tips List PowerPoint Templates by SlideModel.com.
With Visme's Presenter Studio, you can record your presentation and share it with your audience. Record your screen, audio, and video, or switch off your camera for an audio-only presentation. Present asynchronously on your own time, at your own pace. Let your colleagues watch it at their convenience. Create Your Presentation.
A file to store the generated presentations and Microsoft PowerPoint slide shows with the ability to edit them. It was first introduced to store the data in PowerPoint 97 Editor. Stores a set of individual slides with text, graphics, video, and audio information. The file contains information on visual effects inside the slides.
The World Energy Outlook 2023 provides in-depth analysis and strategic insights into every aspect of the global energy system. Against a backdrop of geopolitical tensions and fragile energy markets, this year's report explores how structural shifts in economies and in energy use are shifting the way that the world meets rising demand for energy.
The unique presentation of our case demonstrates that clinical suspicion for cardiac angiosarcoma should be maintained for spontaneous pseudoaneurysm originating from the right atrium. ... Histopathology report initially demonstrated perivascular lymphocyte infiltrate. Six weeks later, the patient represented with chest pain and new word ...